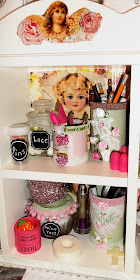
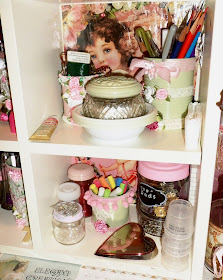
First , I want to Thank Jillian , over at Bella Rose Antiques, for featuring my post, My Creative Space, Part 2, from last week's Let's Talk Vintage Party!!
Thanks so much , Jillian!!
And I also want to Thank Jody and Stan, over at Rooted in Thyme, for featuring post, My Creative Space, Part 1, from last week's Simple and Sweet Friday's party!!
Thanks so much , Jody and Stan!!
Please take some time to visit and link up to these great parties!!
I want to thank everyone who visited and commented on my Creative Space!!
I have been working off and on in my Craft Room since the beginning of the year, weeding out things, organizing and labels what i have and then re-arranging the room.
If you missed my 4 posts on my Creative Space, including my Summer Tree, you can find links to all 4 posts over on my side bar.......
I am still making my rounds to all the links over at the Where Bloggers Create party, hosted by Karen, over at My Desert Cottage!!
So please be patient with me and I will soon be around to visit everyone who linked up!!
Please check out this awesome party and all the fabulous links to Creative Spaces!!
I know you will be inspired!!
Now , if you are like me and have plants that have grown quite tall during the Summer, most Solar Lights seem to get lost in amongst these taller plants.
I thought of an idea on how to add a bit of height to your Solar Lights in your garden!!
First ,we found spikes at Lowes.....
Pound them into the ground where you want to place a Solar Light.......
Now I had 4 pieces of PVC stakes left over from my arbor. They were to go into the ground and anchor the arbor but we chose to anchor it a different way.
So I decided to use these stakes....
Simply pop them over the Spike in the ground......
Next take the Lantern part of your Solar Light off the original stake that it came with and just pop the Solar Light over the PVC stake!!
You can also use round PVC piping for this and cut the pipe to the height that you want your Solar Lights to be !!
I am going to do just that with more of my larger Solar Lights......
You can see how tall my Asters have gotten but you can now see the Solar Light over the Asters!!
Look at the difference in height here......
See how close to the ground the other Solar Light is?????
Here are the 3 more places in my Cottage Garden where I added a bit of height to the Solar Lights..........
This one is in the back of the yard near the fence.......
This one is over near the left corner of the yard.......
And this one is on the right side of the yard not far from the Shed and is a dark corner of the yard.....
And of course, this one that I showed you before.....
I can't wait to go and get a few more spikes and some PVC piping to add a bit more height to a few more Solar Lights in the back yard.....
Now what did I do with the stakes that they came with........
These small Solar Lights are from Wegman's and were in Clearance last year for $1.00!!
You can see the difference in height in the stakes......
So I decided to take the black spike off the bottom of the Solar Light......
And simply dropped the whole thing into the larger silver stake!!
It added a bit more height to these smaller ones!!!
Here is where I used these with the 4 stakes from the other Solar Lights.......
Here in the pot filled with wave petunias under the arbor.......
Here in my little Gnome Garden in a Whiskey Barrel!!
And here in 2 pots on one side of the patio......
Soon, in another post, I will share how my little Cottage Garden looks at night.......
I think these Solar Lights will now be shining a bit more light on my garden.......
We have had a lot of rain and then a week of temps. in the 90's here.
A cool front has come through and this week are high's are near 80 and the lows are in the 50's!!
This beautiful weather has allowed me to get a lot of work done in the Garden.......
I will be sharing how my Cottage Garden is growing in a future post.......
On Sunday, July 26th, I start my Part Time Schedule!!!!
So I will be off 3 days in a row.....
Monday, Tuesday and Wednesday!!!!
I can not wait..........
WHOA!!
If you do not have a blog, PLEASE give me some way to reply to your comment, maybe by including your email in your comment. If I can not find a way to reach you, I will reply on the post where you commented so please check back......
I hope you will come by and visit again!!
And thanks to those who took the time out of their busy day to spend a little bit of time with me!!
Hugs,
Debbie
I am linking up to these weekly parties:
SATURDAY
Pink Saturday
Party Junk
The Creative Collection Link Party
Saturday Sparks
Say G' Day Saturday
SUNDAY
Share It One More Time Sundays
DIY SHowcase
Silver Pennies Sunday
Snickerdoodle Sunday
Sundays at Home
Share It Sunday
Bouquet of Talent Linky Party
Sundays Down Under
MONDAY
Inspiration Mondays
Busy Monday
What'd You Do This Weekend?
Make It Pretty Monday
Merry Monday Linky Party
Cooking and Crafting with J & J
Mod Vintage Mix Monday
TUESDAY
Wake Up Wednesdays
Ducks in a Row Wonderful Wednesdays Blog Hop
Wow Us Wednesday
Sizzle into Summer Party
Vintage Inspiration Party
Party in Your PJ's
Dream Create Inspire Link
What's It Wednesday
Before and After Party
THURSDAY
Homemaking Weekend Link Up Party
It's a Party
Share Your Style Thursday Link Up Party
Home and Garden Party Thursday
Share Your Cup Thursday
Thursday Favorite Things Blog Hop
Inspired Creations Linky Party
My 2 Favorite Things on Thursday
Grace at Home Party
Idea Box- Thursday Linky Party
FRIDAY
Simple and Sweet Fridays
The Creative Exchange
Home Sweet Home Friday
Friday Features Linky Party
Show and Tell Friday
Home Matters Linky Party
Welcome to the Weekend Blog Hop
Flaunt It Fridays
What To Do Weekends
Friday's Five Features Party
Fabulous Fridays - every 2 weeks
Please take some time to visit these terrific hosts and all those joining in on the fun!


